How to Make Benefit Video Reels Assets Different per Product
How to Make Benefit Video Reels Assets Different per Product
The Benefits video reels section normally holds the same videos for every product that uses the template — the videos are picked by hand in each Benefit video block, so they are part of the template, not part of the product.
You can change that by storing the reels on the product instead. Using a metaobject together with a product metafield, each product carries its own list of reels, and the blocks pull whichever reels belong to the product being viewed. You build the section once and every product fills it with its own content.
The result: one product template, no duplicated sections, and a set of benefit reels that changes automatically from product to product.
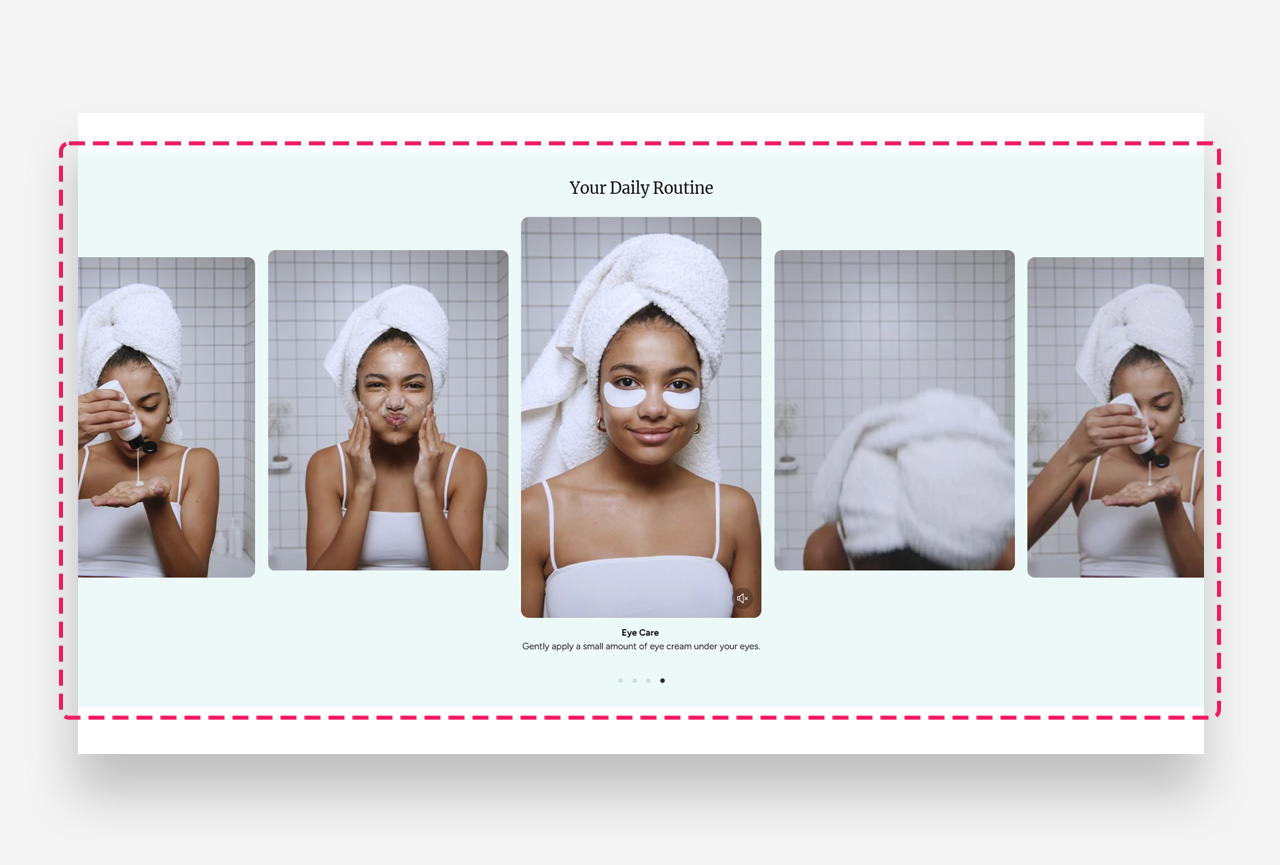
How It Works
A Benefit video block has two settings — A Shopify-hosted video and Heading. Both can be connected to a dynamic source instead of a fixed value.
Product metafields are only offered as dynamic sources when the section sits in a product context — that is, on the Product template (or in a Featured product section). If you add Benefits video reels to the homepage, the dynamic source picker will not list product metafields, because there is no product to read them from.
Step-by-Step Setup
Step 1: Create the Video Reels metaobject
The metaobject defines the shape of a single reel.
- In your Shopify admin, go to Settings → Metafields and metaobjects → Metaobject definitions.
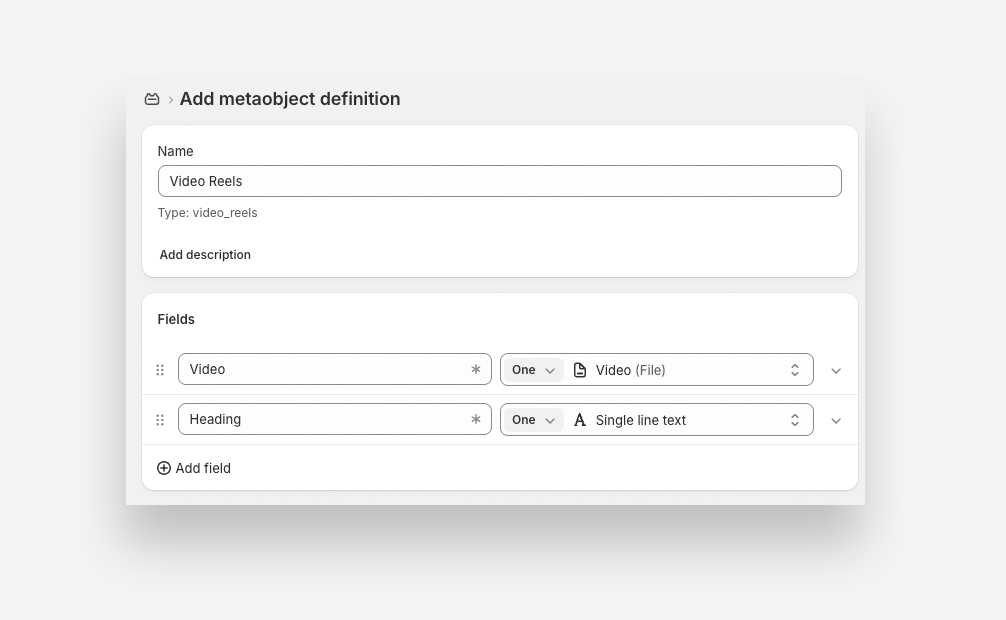
- Click Add metaobject definition.
- In Name, type Video Reels.
- Add the fields:
- Video — type File. This holds the reel video itself.
- Heading — type Single line text. This is the caption shown under the video.
- Click Save.
Step 2: Create the product metafield and link it to the metaobject
The metafield is what attaches reels to individual products.
- Go to Settings → Metafields and metaobjects → Products.
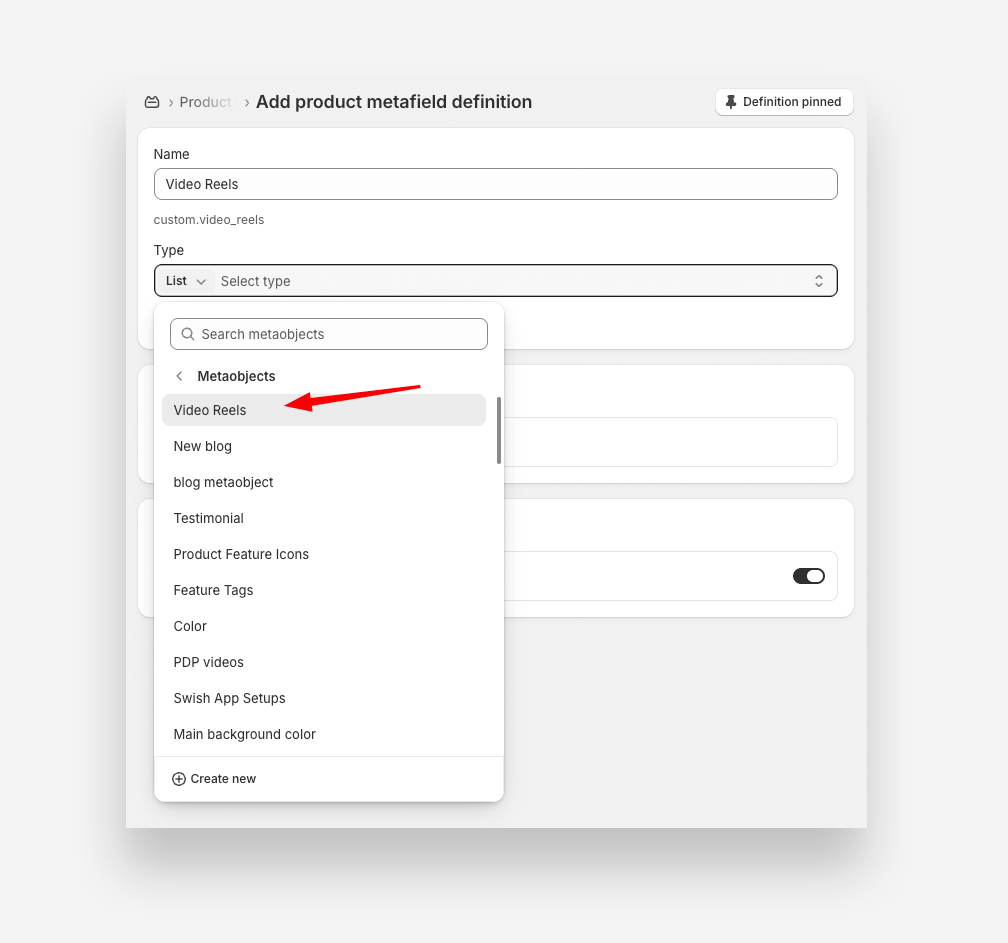
- Click Add definition.
- Configure the definition:
- Name:
Video Reels— Shopify fills in the namespace and key ascustom.video_reels - Type: set the left dropdown to List, then open Select type → Metaobjects and choose Video Reels
- Name:
- Click Save.
Step 3: Add reels to a product
Now fill the metafield per product. This is the only step you repeat for each product.
-
Open a product in your Shopify admin.
-
Scroll to the Product metafields section and find Video Reels, marked Metaobject (List).
-
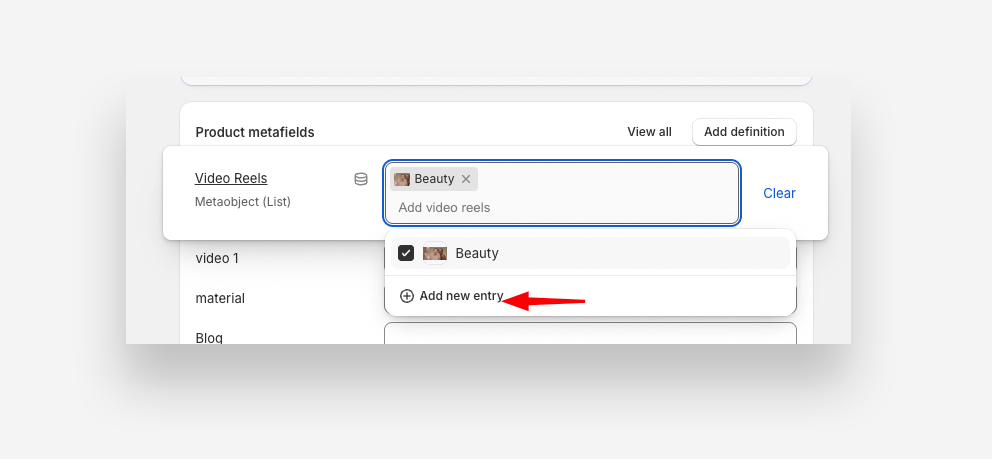
Click the Add video reels field, then either:
- tick an existing entry — useful for a benefit shared across products, such as a free-shipping or warranty reel, or
- click Add new entry to create one, upload the Video, and type the Heading
-
Add as many entries as you want reels, in the order you want them to appear. Each one you pick appears as a chip in the field.
-
Click Save.
Step 4: Connect the blocks to the metafield
- Open the Theme Editor and navigate to a product page.
- Add the Benefits video reels section, or select it if it is already there.
- Select the first Benefit video block.
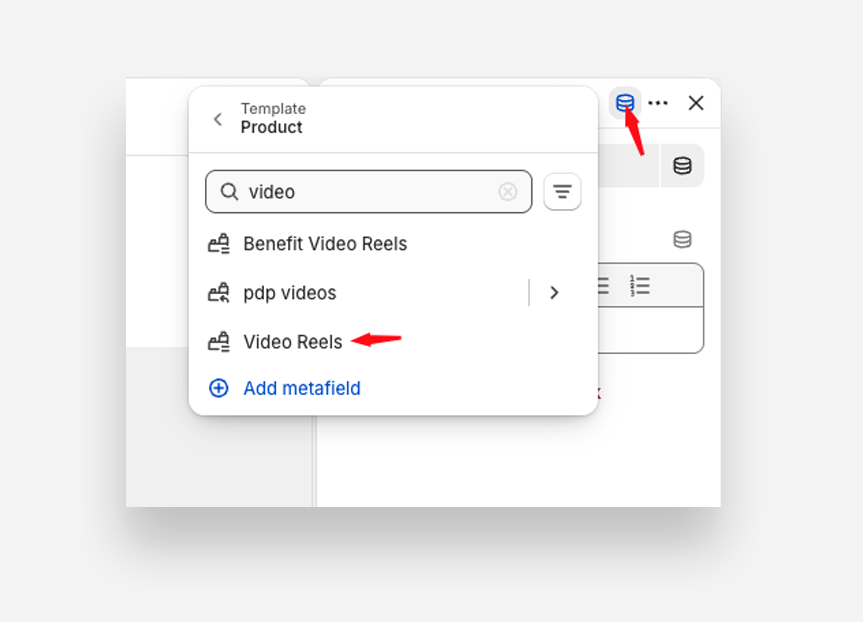
- Next to A Shopify-hosted video, click the dynamic source icon (the database symbol).
- Choose the Video Reels metafield, then pick the Video field of the first entry. If the list is long, type
videoin the search box to filter it. - Do the same for Heading, choosing the Heading field of the same entry.
- Repeat for each remaining block, moving one entry down the list each time — block 2 to the second entry, block 3 to the third.
- Click Save.
The section now renders each product's own reels. Switch to another product in the theme editor to confirm the videos change.
Reusing the Same Approach Elsewhere
The pattern — metaobject for structure, list metafield for the per-product values, dynamic sources to connect them — works for any section whose block settings accept dynamic sources. The Shoppable video reels and Testimonial video reels sections can be made per product the same way.