Compare Products
What is the Compare Products Section?
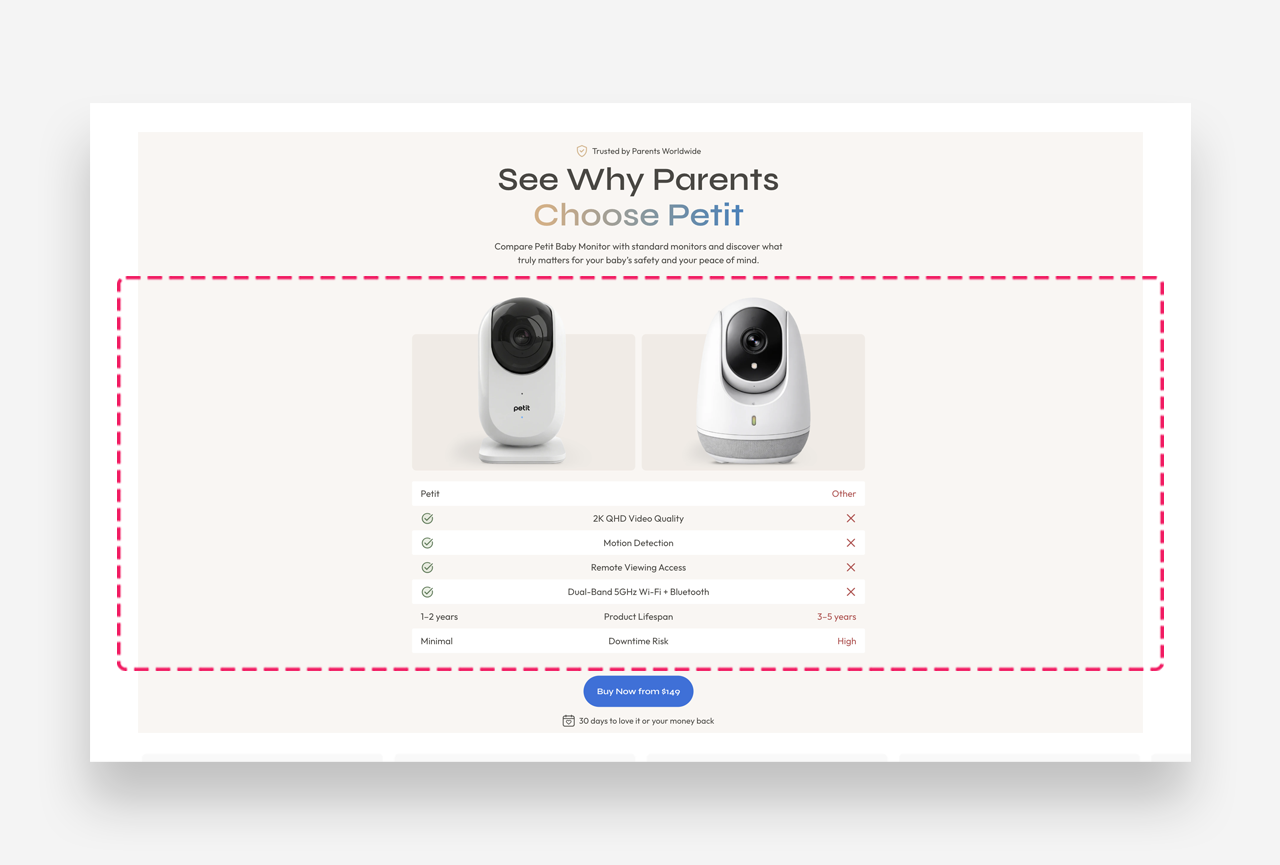
The Compare Products section allows you to present your product in a visually appealing way, highlighting its features and advantages. It is a flexible section designed to build customer trust by presenting product information clearly and transparently.
Main Settings
General
- Heading: Set the title for the section, e.g. "Compare Products". Optionally enable the rich text field to access text formatting options.
- Section width: Adjust the width of the section using the slider or by entering a value manually in pixels.
Colors
The Transparent value is the default and inherits settings from the global theme configuration.
- Background Color: Set the background color for the entire section.
- Background Opacity: Control the transparency of the background using the slider.
- Text Color: The global text color for the section.
- Text Color (left column): Set a distinct text color for the left column.
- Text Color (right column): Set a distinct text color for the right column.
- Background colors odd rows: Highlight every other row with a different background color for improved readability.
Section Spacing
- Distance from the top: Adjust the spacing above the section.
- Distance from the bottom: Adjust the spacing below the section.
Customize Images Block
The Images block is a visual sub-block within the Compare Products section. It displays two product images side by side, separated by a central comparison badge — giving customers an immediate visual reference for the products being compared.
Image Settings
- Left product image: Upload or select an image to represent the left-side product.
- Right product image: Upload or select an image to represent the right-side product.
- Image background color: Set a background color displayed behind both product images.
- Images Background Radius: Adjust the corner rounding of the image containers using the slider or by entering a value manually in pixels.
Compare Badge
The Compare Badge is the circular overlay displayed between the two product images, visually reinforcing the comparison.
- Badge text: Enter the text displayed inside the badge using the rich text editor.
- Badge background color: Set the background color of the badge.
- Badge text color: Set the color of the text inside the badge.
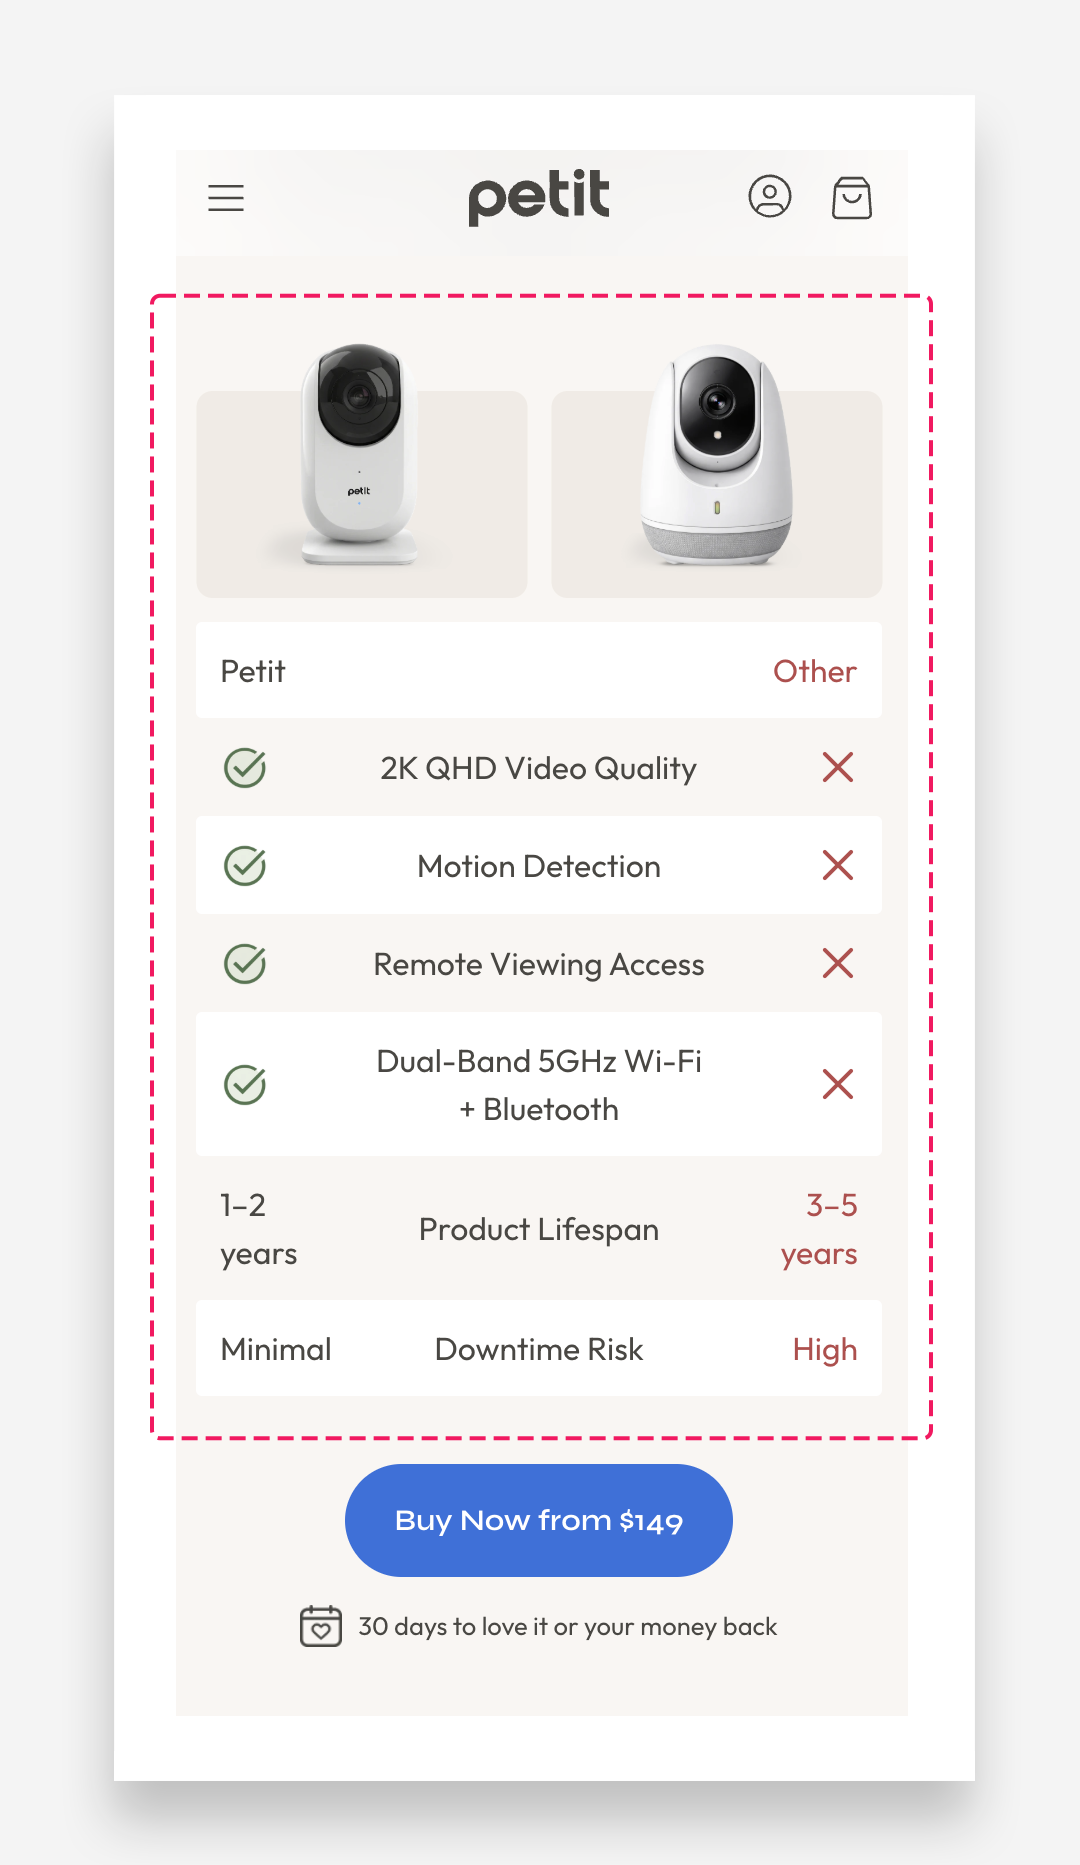
Mobile view example
Customize Compare Table Block
The Compare Table block contains no customizable settings at the section level — all configuration is handled within its individual Table Row blocks. Use the Add block button to insert new rows into the table.
Customize Table Row Block
Each Table Row represents a single comparison entry displayed across both product columns. Each row consists of three parts: a left cell, a center label, and a right cell.
Left Side
- Left Content Type: Choose between Text or Icon to define what is displayed in the left cell.
- Left Text: Enter the content for the left cell using the rich text editor. Supports formatting options including bold, italic, and links. Only used when Left Content Type is set to Text.
- Left Icon/Image: Upload or select an image or icon to display in the left cell. Only used when the Left Content Type is set to Icon.
- Select Icon: Choose an icon from the available icon set to display in the left cell.
- Left icon height: Adjust the size of the icon using the slider or by entering a value manually in pixels.
Center
- Center text: Enter the label displayed in the center column, describing the feature or attribute being compared across both products.
Right Side
- Right Content Type: Choose between Text or Icon to define what is displayed in the right cell.
- Right Text: Enter the content for the right cell using the rich text editor. Supports formatting options including bold, italic, and links. Only used when the Right Content Type is set to Text.
- Right Icon/Image: Upload or select an image or icon to display in the right cell. Only used when the Right Content Type is set to Icon.
- Select Icon: Choose an icon from the available icon set to display in the right cell.
- Right icon height: Adjust the size of the icon using the slider or by entering a value manually in pixels.