Block - Promotion / Mega Menu
What is the Promotion Menu?
Since v1.0.0
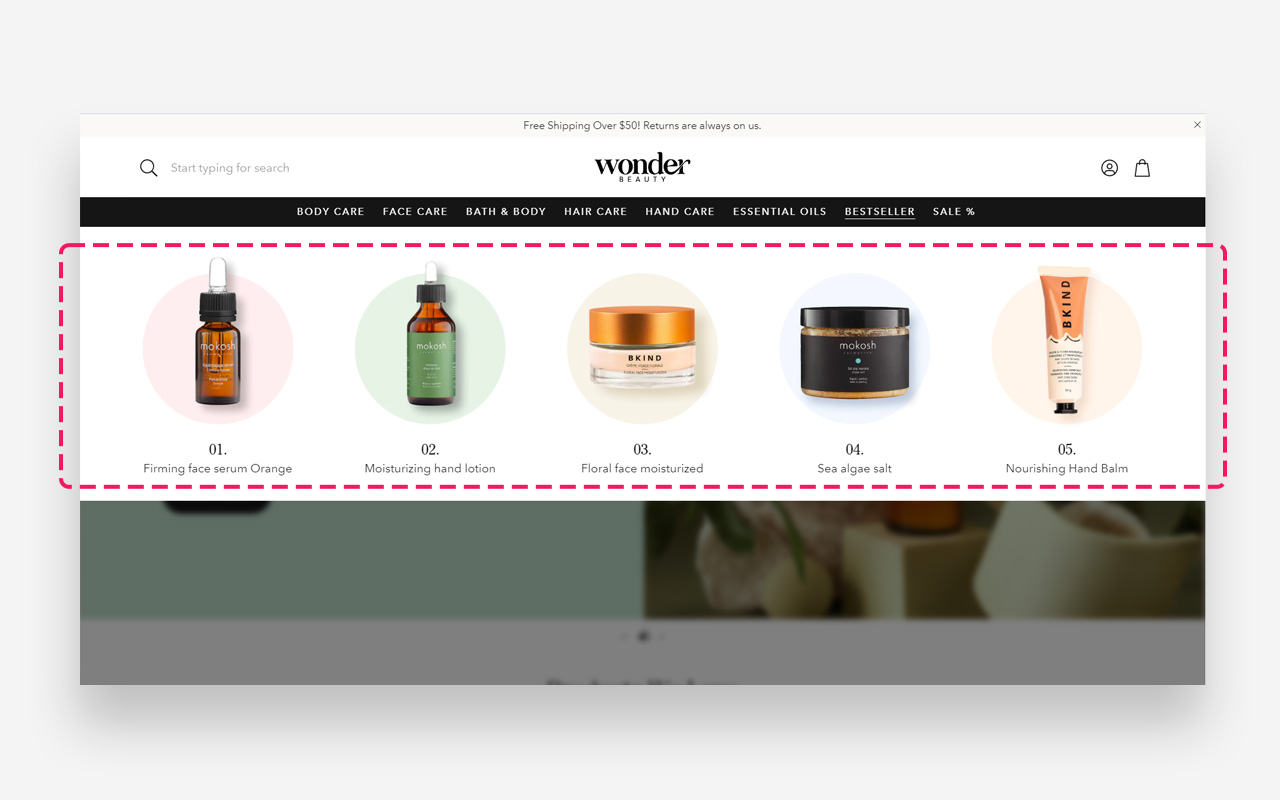
The Promotion Menu is a mega-menu block in the header that displays images, headings, and links in a multi-column layout. It is ideal for highlighting featured categories, bestsellers, or seasonal promotions directly in your store's navigation.
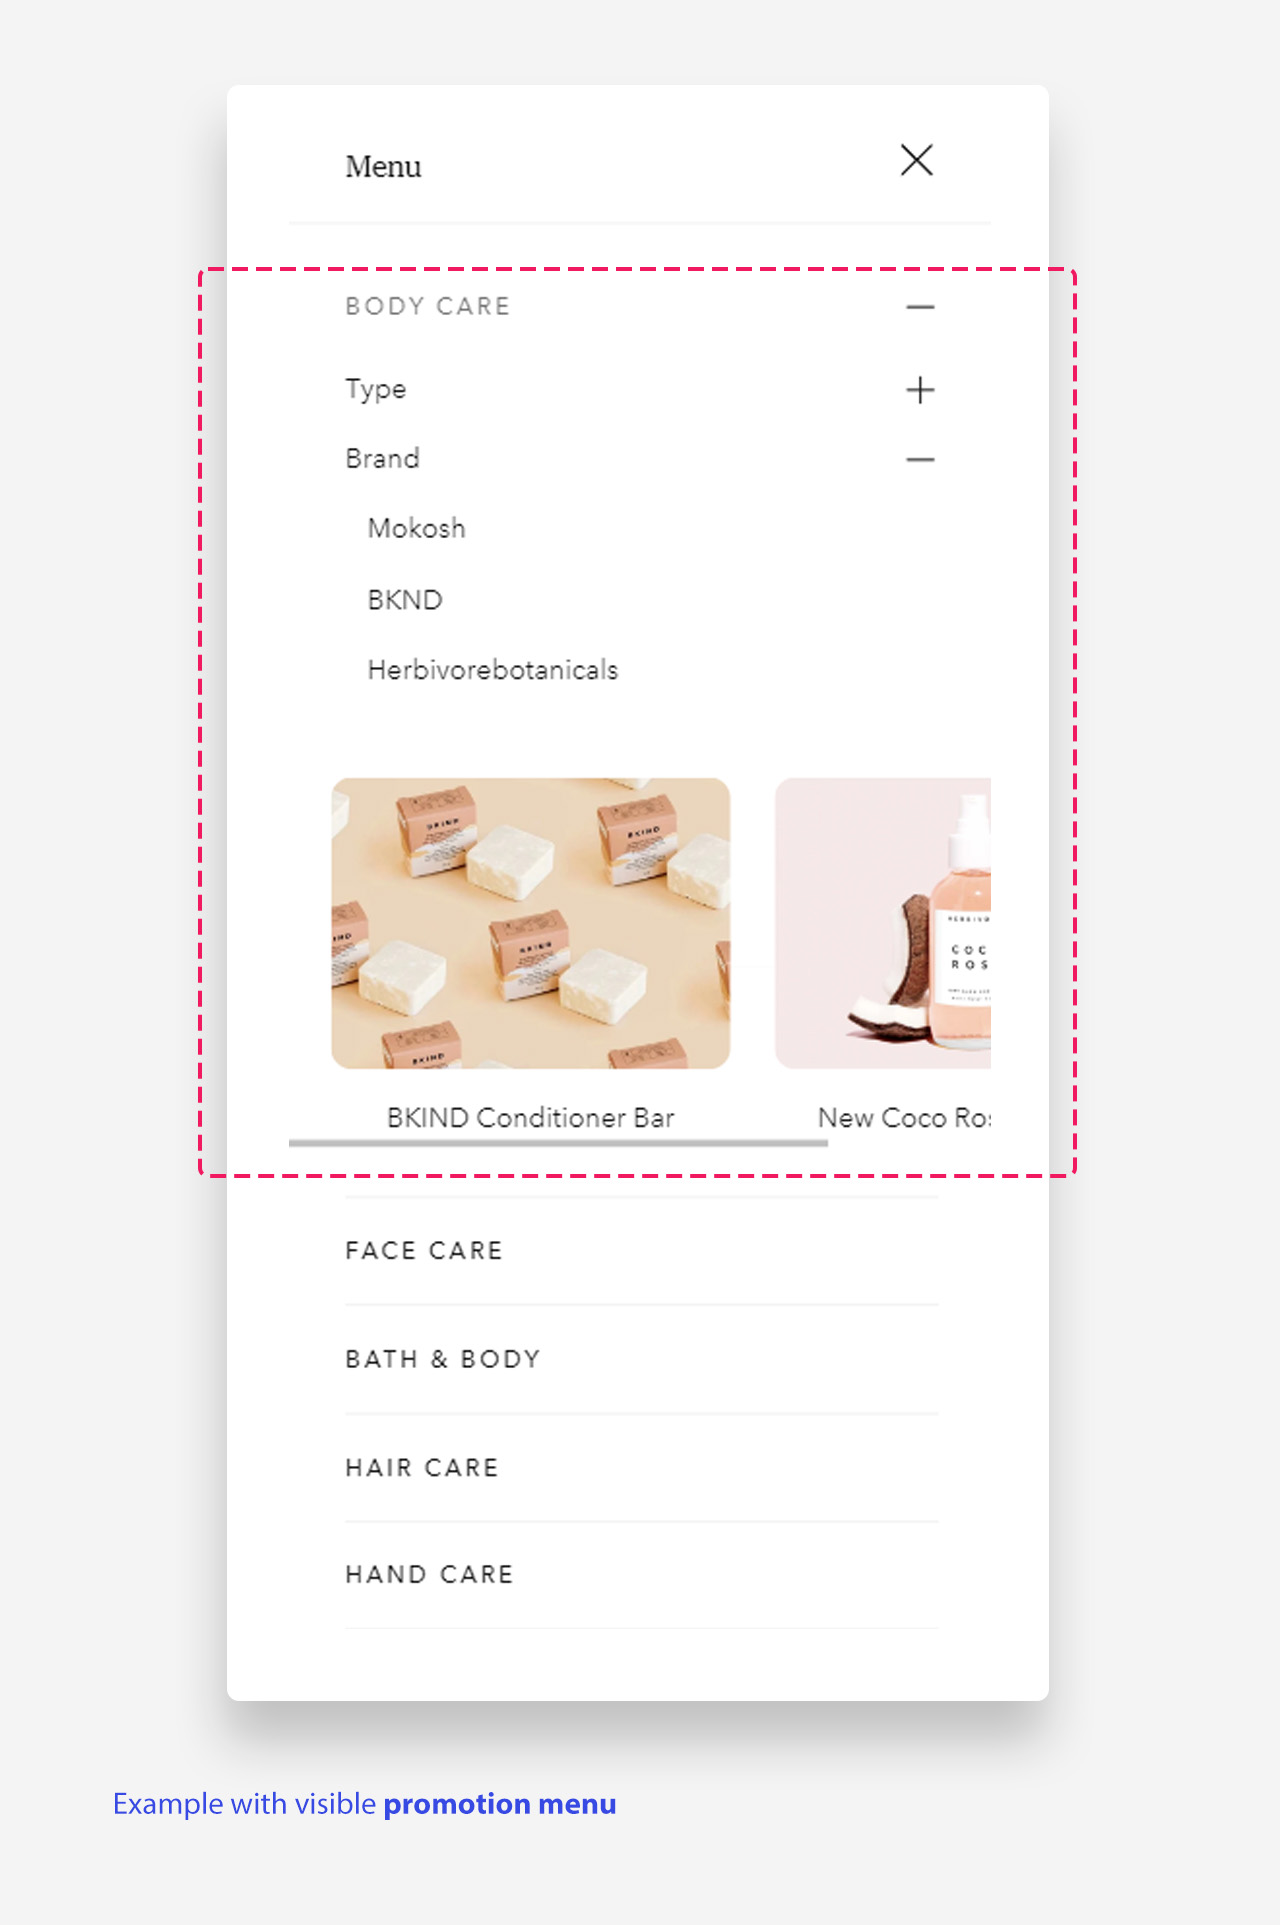
Mobile view example
How to Set Up the Promotion Menu
Step 1: Create a navigation item for the Promotion Menu
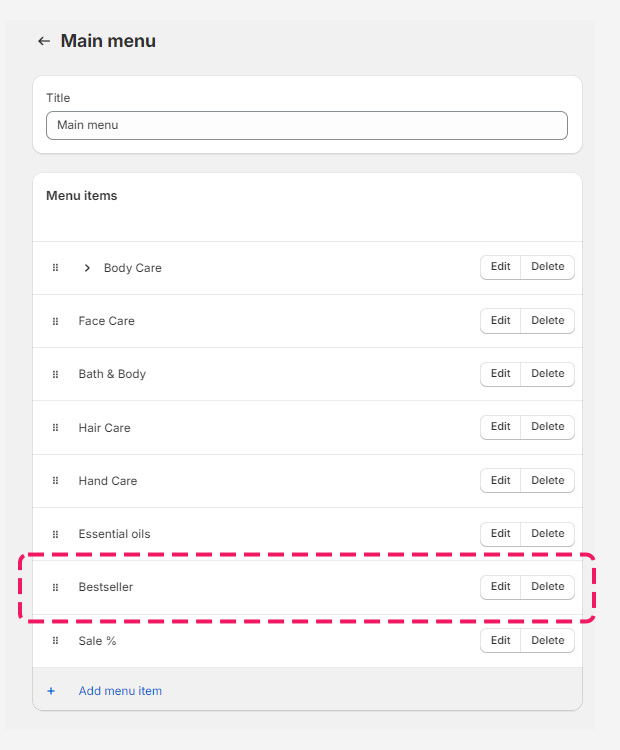
- Open Navigation settings — In your Shopify admin, go to Online Store > Navigation.
- Select your main menu — Open the menu where you want the Promotion Menu to appear.
- Add a new item — Click Add menu item and enter a name for the entry point, for example "Bestsellers".
- Save your changes — Save the menu to update your store's header.
Step 2: Configure the Promotion Menu in the Theme Customizer
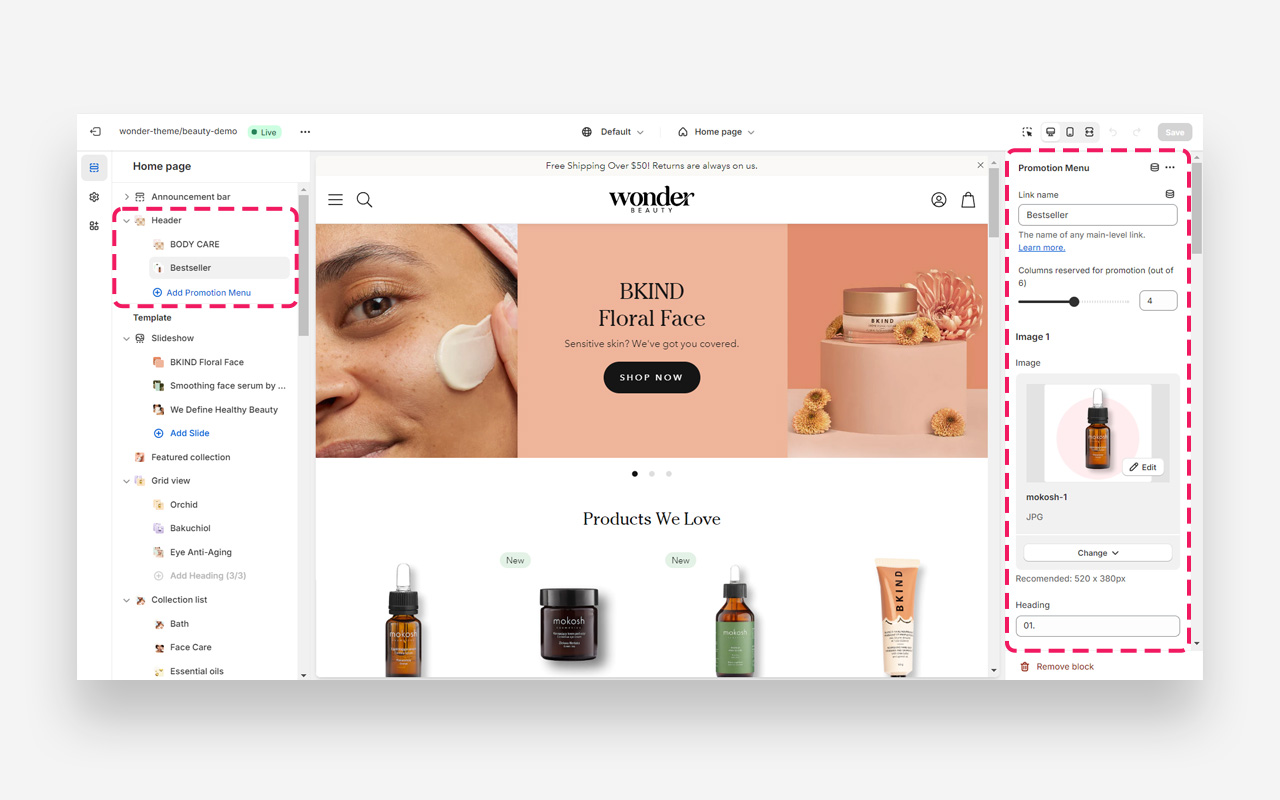
- Open Theme Customization — In your Shopify admin, go to Online Store > Themes, locate your current theme, and select Customize.
- Access the Header — In the Theme Customizer, navigate to the Header section.
- Add a Promotion Menu block — Click Add block and select Promotion Menu.
- Link the navigation item — In the block settings, enter the name of the navigation item you created, for example "Bestsellers".
- Set the column layout — Choose the number of columns for the menu layout.
- Customize content — Upload images, add headings, descriptive text, and links for each column. You can add up to 6 images.
- Save and review — Save your changes and preview the store to verify all links and layout appear as intended.
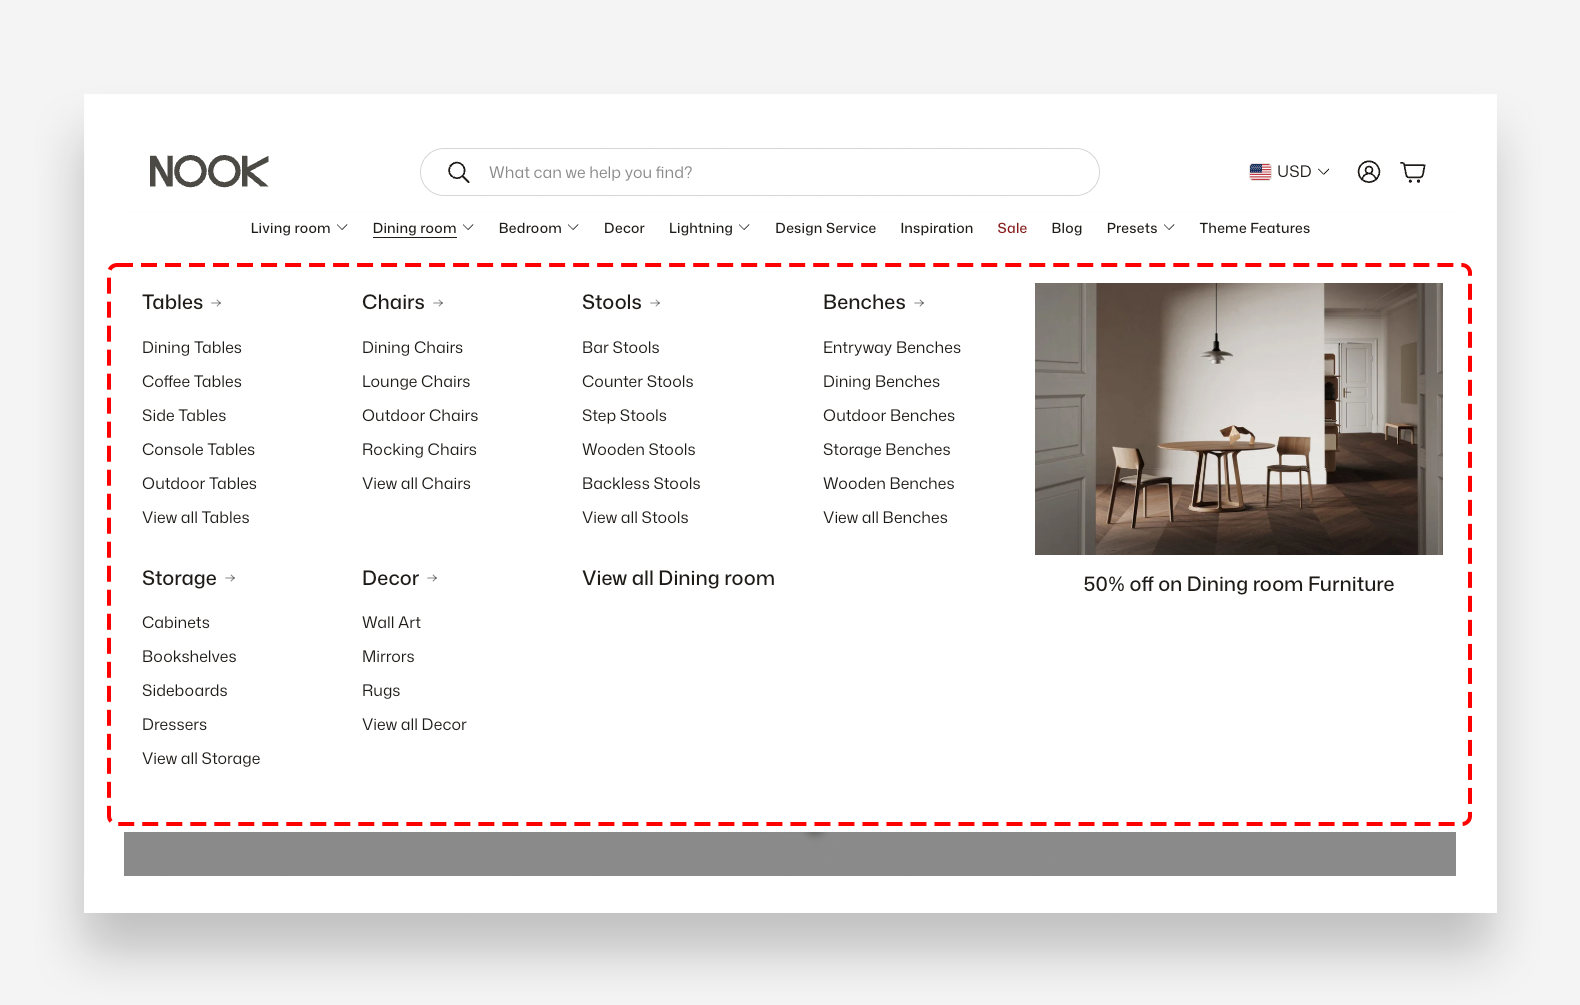
How to Set Up the Mega Menu with Promotion Menu
Step 1: Create a navigation
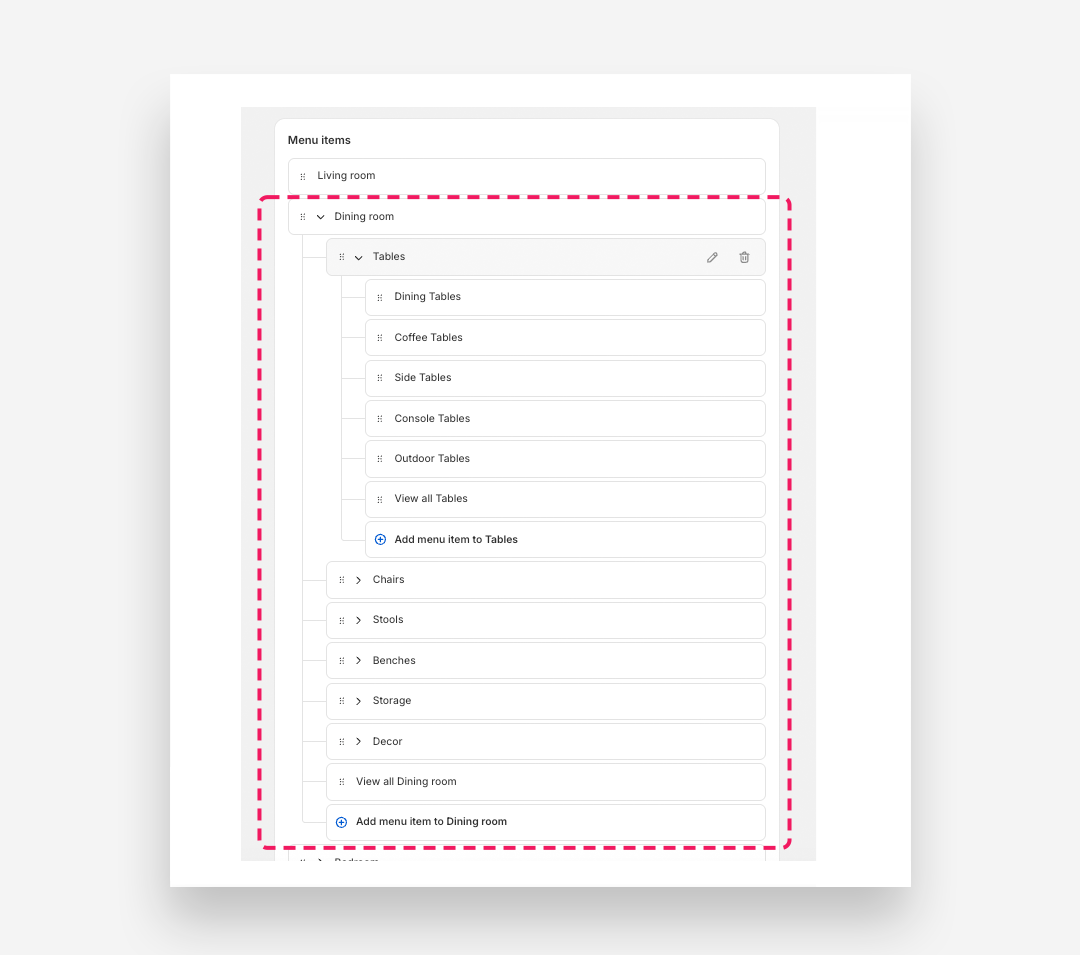
- Open Navigation settings — In your Shopify admin, go to Online Store > Navigation and click on the menu you want to edit (e.g. "Main Menu").
- Add a top-level parent item — Click Add menu item, enter a name (e.g. "Dining room") and set its link to the relevant collection or page. Click Save.
- Add child items — Click Add menu item again and add each subcategory (e.g. "Tables", "Chairs", "Stools"). Set their respective links and click Save after each one.
- Nest items by dragging — Drag each child item slightly to the right underneath its intended parent item. A dotted line appears to indicate the nesting level. Repeat for every item you want to nest.
- Add a second level (grandchild items) — To nest items one level deeper (e.g. "Dining Tables" under "Tables"), add them via Add menu item and drag them to the right underneath the relevant Level 2 item.
- Expand a top-level item — Click the chevron icon (›) next to any menu item (e.g. "Dining room") to reveal its nested subcategories.
- Reorder items — Grab the drag handle (⠿) on the left side of any item and drag it to a new position within the same level.
- Edit an item — Hover over any subcategory row to reveal the pencil icon on the right, then click it to update the item's label or link URL.
- Delete an item — Hover over the row and click the trash icon on the right to remove the item from the menu.
- Save your changes — Click Save menu to publish the updated structure to your storefront.
Step 2: Configure the Mega Menu with Promotion Menu
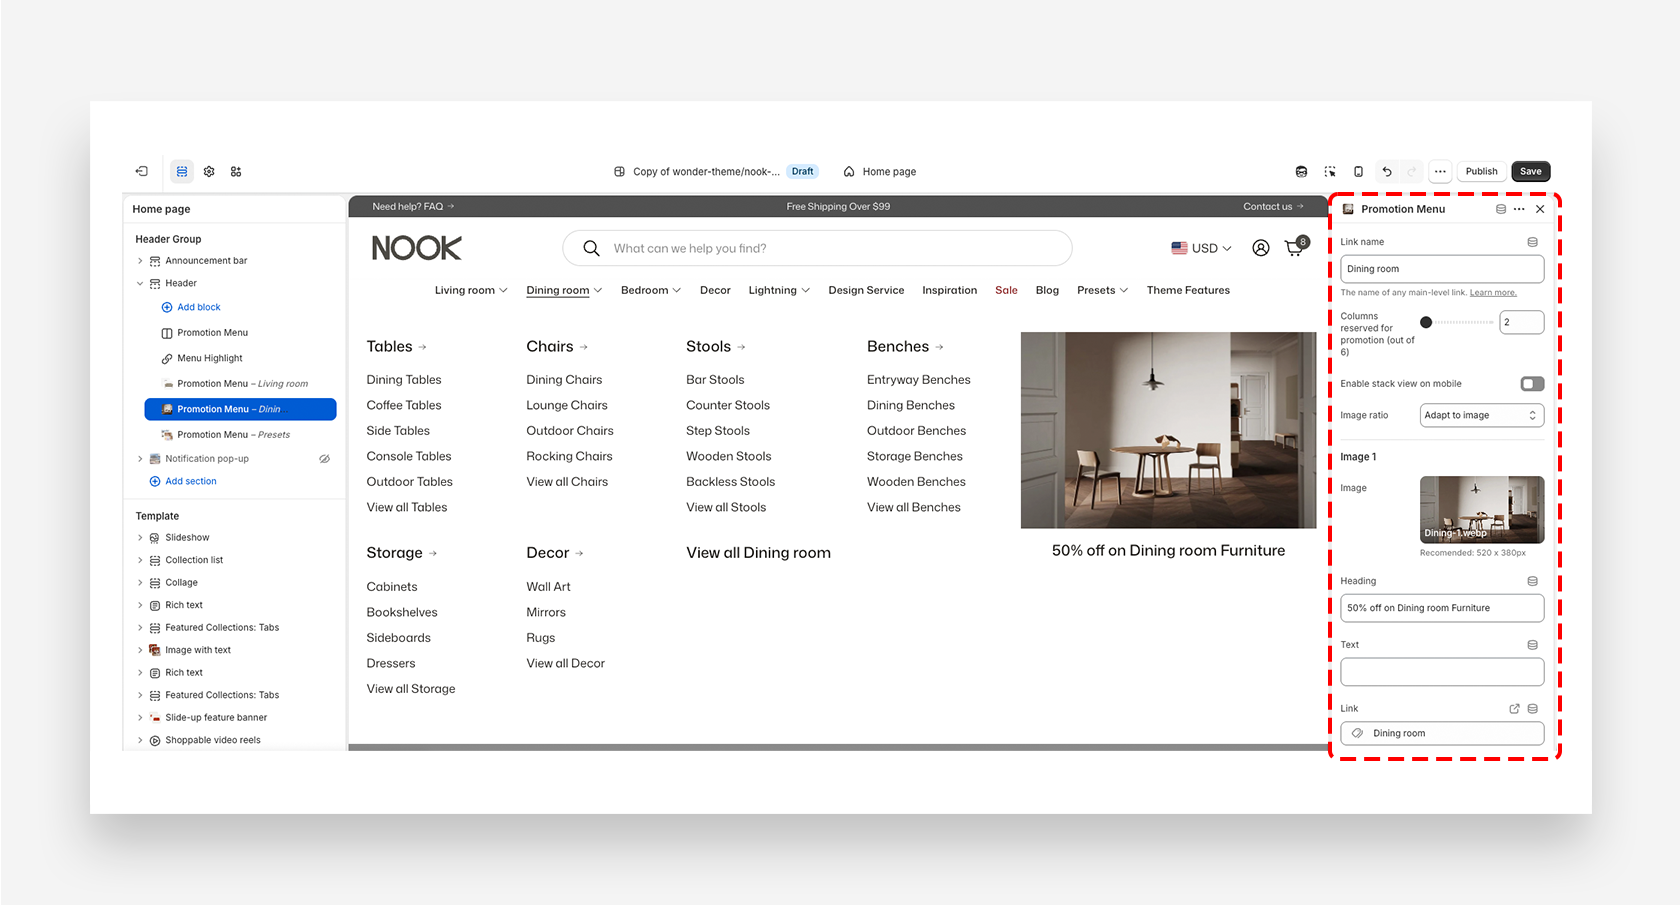
- Open Theme Customization — In your Shopify admin, go to Online Store > Themes, locate your current theme, and select Customize.
- Access the Header — In the Theme Customizer, navigate to the Header section.
- Add a Promotion Menu block — Click Add block and select Promotion Menu.
- Link the navigation item — In the block settings, enter the name of the navigation item you created, for example "Dining room".
- Set the column layout — Choose the number of columns for the menu layout.
- Customize content — Upload images, add headings, descriptive text, and links for each column. You can add up to 6 images.
- Save and review — Save your changes and preview the store to verify all links and layout appear as intended.